'How To' Section
If you are just getting started with colour pencils and are unsure about how to get an outline down, colour picking, how to edit images, which resources to use this section is for you!
Please see the videos below for all the information to get you started with your colour pencil works of art!
Accessing Tutorials (youtube.com)
Everything you need to know about watching and accessing the tutorials!
If you are a paid member or Free member please sign up to the Facebook page:
Lisa Galley Art Patreon Membership Group
(9) Lisa Galley Art Patreon Membership Group | Facebook
Every new member Paid or Free will be invited via email but if you don’t see it, please request at the Facebook group above. You can share what you are working on and see exclusive content!
When finding reference photos, the rule is basically that you need to use royalty free images when using photos that you haven’t taken yourself. This means that an artist/photographer has given permission for you to use their image any way you like. The way you know if they are royalty free is to either; ask them to use the image or access them from a royalty free site. Some sites like ‘istock’ will usually want you to pay before downloading them but there are a lot that have free images which I will list below.
It’s important to remember that photographers are artists too and you should always credit the artist. I always try to credit the photographers and where I accessed the image. Here are a couple of sites I use and their links:
Pixabay – 4.5 million+ Stunning Free Images to Use Anywhere – Pixabay – Pixabay
Pexels – Free Stock Photos, Royalty Free Stock Images & Copyright Free Pictures · Pexels
Dreamstime – Stock Photos & Images, Vectors, Video & Audio – Dreamstime
Unsplash – Beautiful Free Images & Pictures | Unsplash
Finally – Facebook group called – ‘Free Reference Photos for Artists’ – Free Reference Photos For Artists | Facebook
Welcome to this outline video. This one is a little different as I’m using ‘X-Press IT Transfer paper – graphite’ to get my outline down.
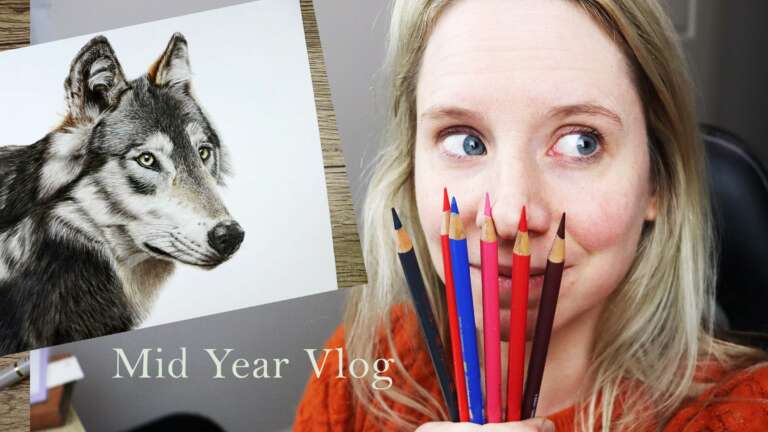
Vlog
Here are the collection of my Vlogs! I’m looking at releasing a vlog every few months covering what is going on in my artistic life and personal life including what is coming up next.
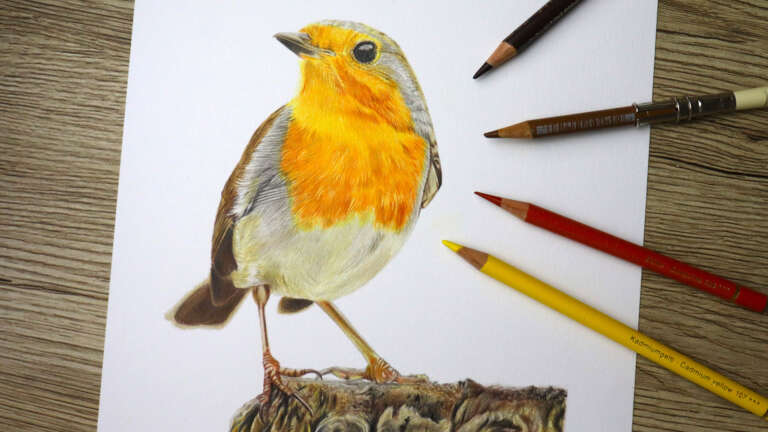
Robin
Welcome to this festive little Robin tutorial! Completed in just over 5 hours this short tutorial is great for learning to blend with your colour pencils, learn about feather texture and getting in little details. For this tutorial we are sticking with the 60 Polychromos set of colours.
- Faber Castell Polychromos Pencils
- Strathmore Bristol Vellum Paper size 11×8 inch (Bird is around 6×4 inch on the page)
- Kneadable Eraser
- Derwent Crank Handle Sharpener
- Faber Castell Superpoint Mini Sharpener
- Sandpaper Sharpener
- Slice Tool / craft knife
- Fluffy Brush
- Washi Tape
Welcome to this outline video. This one is a little different as I’m using ‘X-Press IT Transfer paper – graphite’ to get my outline down.
are interested to see the process come along and I hope you like this one! As I worked through this piece, I did add some more colours so make sure to see the colour list attachment to see all the colours used. Program for colour picking: Photoshop Reference from Pixabay: Photographer Credit: Redforest_Nate
Leafy Seadragon
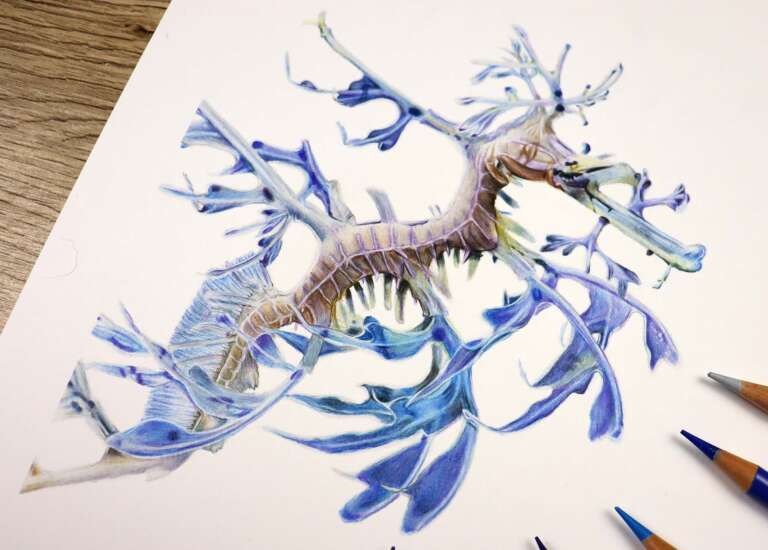
Welcome to this unique Leafy Seadragon tutorial! Completed in just over 9 hours this tutorial is great for learning to break down little sections at a time and practice blending smooth colours with your pencils. To get the blue tone required we blend together greys, blues and purples.
Faber Castell Polychromos Pencils
Prisma Colour Soft White Pencil
Strathmore Bristol Vellum Paper size 11×9 inch (Owl is around 8×6 inch on the page)
Kneadable Eraser
Derwent Crank Handle Sharpener
Faber Castell Superpoint Mini Sharpener
Sandpaper Sharpener
Slice Tool / craft knife
Fluffy Brush
Washi Tape
Leafy Seadragon Colour Picking | Patreon
In this video we go over the process I use to pick colours for this fancy seadragon! I’ve pulled together all my blue pencils for this one so if you are interested to see the process come along and I hope you like this one! As I worked through this piece, I did add some more colours so make sure to see the colour list attachment to see all the colours used. Program for colour picking: Photoshop Reference from Pixabay: Photographer Credit: Redforest_Nate
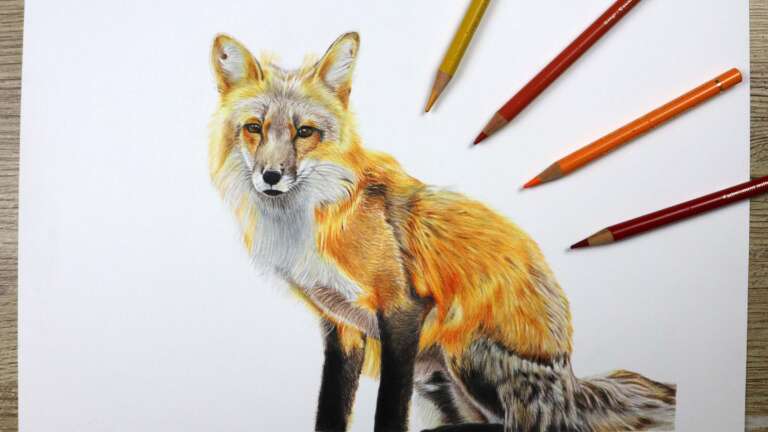
Fox
Welcome to this handsome shaggy fox tutorial! Completed in just over 8 hours this is great for practicing fur texture by blending just with your pencils. Learning about fur direction, orange, white and black fur in one tutorial.
MATERIAL LIST
Please remember any supplies you have are able to be used for this piece, it is not necessary to use the exact colours and supplies listed below:
Faber Castell Polychromos Pencils
Prisma Colour Soft White Pencil
Strathmore Bristol Vellum Paper size 11×14 inch (fox is around 7×9 inch on the page)
Kneadable Eraser
Derwent Crank Handle Sharpener
Faber Castell Superpoint Mini Sharpener
Sandpaper Sharpener
Embossing Tool
Slice Tool / craft knife
Fluffy Brush
Washi Tape
Reference from pixabay – photographer credit: Pixabay
Chipmunk
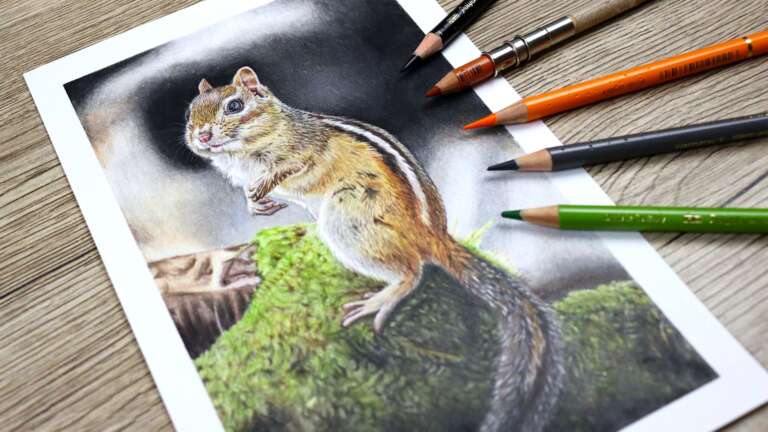
Welcome to this adorable Chipmunk tutorial! Completed in just over 9 hours this is great for practicing really tiny details while working on fur texture and getting a smooth background. I really recommend having a sanding block or means to get a sharp point if you are working at the scale I have.
Faber Castell Polychromos Pencils
Prisma Colour Soft White Pencil / Caran Dache Luminance White / Soft white Holbein Pencil
Strathmore Bristol Vellum Paper A4 Size (21x30cm)
Zest-it Colour Pencil Blender (blending sponge optional)
Small Round Size 3 Paint Brush Medium
Water Colour Brush
Kneadable Eraser
Derwent Crank Handle Sharpener
Faber Castell Superpoint Mini Sharpener
Sandpaper Sharpener
Embossing Tool
Slice Tool / craft knife
Fluffy Brush
Washi Tape
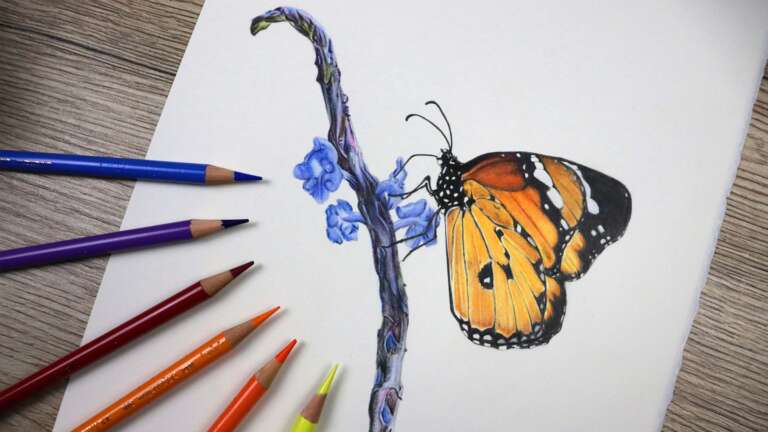
Butterfly, Stem and Flowers
Welcome to this butterfly tutorial! In just over 5.5 hours we will complete this vibrant butterfly, stem and flowers with colour pencils. No solvent needed for this one so this is great to practice blending smooth and shiny surfaces with just your pencils.
Faber Castell Polychromos Pencils
Prisma Colour Soft White Pencil (or white waxy pencil)
Caran D’ache Luminance White Pencil
Faber Castell Pitt Artists Pen brush – Black (optional)
Saunders Waterford Hot Pressed Watercolour paper 8×10 inch (image is around 7×7 inches on the page)
Kneadable Eraser
Derwent Crank Handle Sharpener
Faber Castell Superpoint Mini Sharpener
Sandpaper Sharpener
Slice Tool
Fluffy Brush
Gosling
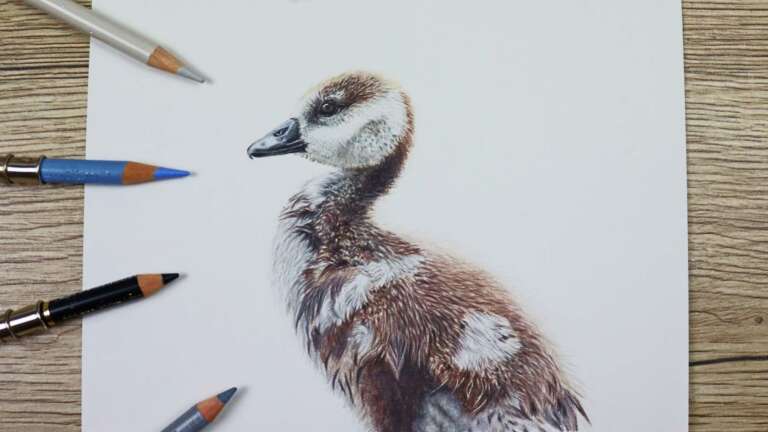
Welcome to this Egyptian Gosling tutorial. In just over 3.5 hours we will complete this fluffy little bird. This is great for practicing feathers and that smooth beak texture.
- Faber Castell Polychromos Pencils
- Prisma Colour Soft White Pencil (or white waxy pencil – polychromos white)
- Strathmore Colour Pencil Paper 8×8 inch (Gosling is 4.5×4.5 inches on the page)
- Zest-it Colour Pencil Blender (optional)
- Small paint brush
- Embossing Tool
- Kneadable Eraser
- Derwent Crank Handle Sharpener
- Faber Castell Superpoint Mini Sharpener
- Sandpaper Sharpener
- Slice Tool
- Fluffy Brush
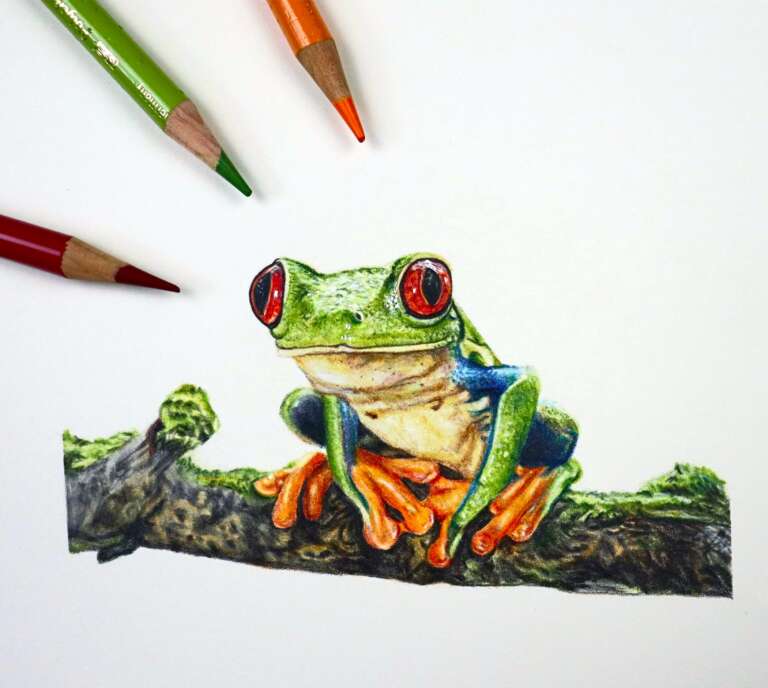
Frog
Welcome to this frog tutorial. In just over 4 hours we will complete this shiny frog and mossy branch with colour pencils. No solvent needed for this one so this is great to practice blending smooth and shiny surfaces with just your pencils.
- Faber Castell Polychromos Pencils
- Prisma Colour Soft White Pencil (or white waxy pencil)
- Fabriano Artistico Hot Pressed Watercolour paper 8×6 inch page but frog is 5×2.5 inches on the page
- Kneadable Eraser
- Derwent Crank Handle Sharpener
- Faber Castell Superpoint Mini Sharpener
- Sandpaper Sharpener
- Slice Tool
- Fluffy Brush
Reference photo from pexels.com – photographer credit: Jean Paul Montanaro
Sun Conure

Complete this colourful Sun Conure tutorial in just under 4 hours! So refreshing to get out some of the bright yellows, oranges, greens and blues for this beautiful little bird. This tutorial is great to learn feathers and smooth texture on the beak and bark.
- Faber Castell Polychromos 60 set
- Warm Grey I – Cold Grey I – Alternative – Warm Grey II and Cold Grey II
- Sky Blue – Alternative – Light Ultramarine
- Nougat – Alternative – Raw Umber
- Prismacolour White
- Fabriano Artistico Hot Pressed Watercolour Paper 8×6 inch (bird is around 4.6×6 inch on the page)
- Kneadable Eraser
- Derwent Crank Handle Sharpener
- Faber Castell Superpoint Mini Sharpener
- Sandpaper Sharpener
- Slice Tool
- Fluffy Brush
- Washi Tape
Sun Conure Image Transfer and Colour Picking | Patreon
From reference photo to line art on the page – this video explains the process of getting your reference photo outline onto the page ready to colour and also the colour picking process.
We start by detailing how to outline the reference photo on a tablet. If you don’t have a tablet, you can always just use tracing paper on a printed copy of the reference photo.
You then see how I email the sketch to myself, put into a word program to get the correct size, flip the image and then print to outline with tracing paper.
Then it’s time to pick colours and you can see the programs and process I use to pick colours for my illustrations. The next video on this colourful sun conure will be the full real time colouring process for you to follow along with.
Remember there is not right or wrong way to do this! Some artists are that good they don’t need an outline and more power to them!! Some artists prefer to sketch, use the grid method or trace but any of these are fine!
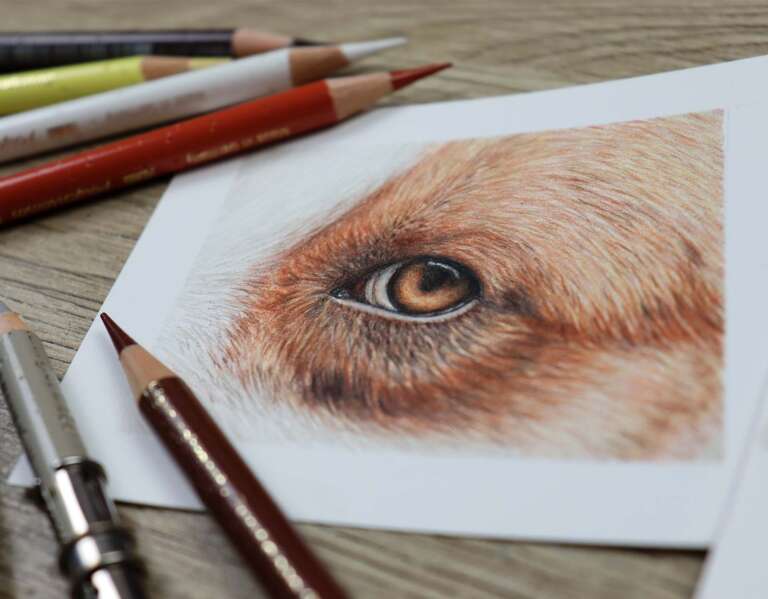
Dog Eye
Welcome to this dog eye tutorial! Complete this beautiful dogs eye and fur in just under 2 hours with only 7 pencils!!! This is great for beginners to learn a smaller piece or for experiences artists who want to focus on those little details up close!
- Faber Castell Polychromos 60 set
- Fabriano Artistico Hot Pressed Watercolour Paper 4×3 inches with 1cm gap
- Kneadable Eraser
- Derwent Crank Handle Sharpener
- Washi Tape
Chihuahua
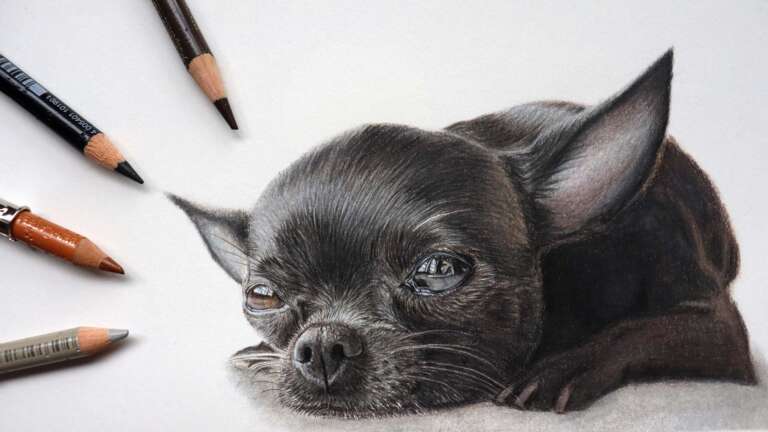
Complete this sweet little Chihuahua with big glassy eyes using colour pencils in real-time over 5.5 hours. This tutorial is great to learn dark and black fur and how to get those big reflective eyes. This piece requires a colour pencil liquid blender.
- Faber Castell Polychromos 60 set
- Prismacolour White
- Strathmore Colour Pencil Paper 8×8 inch (dog around 6×4 inch)
- Zest-it Colour Pencil Blender (blending sponge)
- Small Round Size 3 Paint Brush
- Medium Round Watercolour Brush
- Embossing Tool
- Kneadable Eraser
- Derwent Crank Handle Sharpener
- Faber Castell Superpoint Mini Sharpener
- Sandpaper Sharpener
- Slice Tool
- Fluffy Brush
- Washi Tape
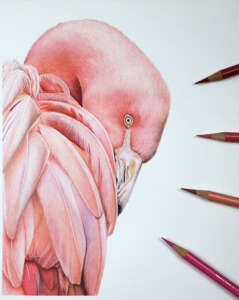
Flamingo Feather
Follow along with this pink feather tutorial to see the layering and blending process for one of these soft pink feathers in 30 minutes. Completing this tutorial would be a great start to completing smooth texture and possibly even giving this one a go!
- Faber Castell Polychromos pencils
- Individual Pencil Caran Dache Luminance White
- Fabriano Artistico Hot Pressed Watercolour Paper
- Zest-it Colour Pencil Blender (blending sponge)
- Small Round Size 3 Paint Brush
- Kneadable Eraser
- Derwent Crank Handle Sharpener
- Faber Castell Superpoint Mini Sharpener
- Sandpaper Sharpener
- Fluffy Brush
Reference photo from un-splash – Photographer Credit: Gwen Weustink
Peacock Feather
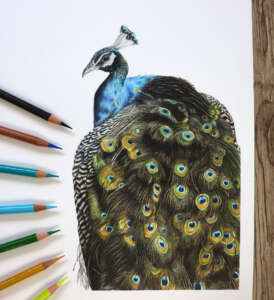
When thinking of the most detailed creatures to draw – Peacock needs to be up there with the hardest! This tutorial explains the process in 40 minutes for one of these beautiful, detailed feathers. Some of the colours are not from the Polychromos 60 set so I have put some alternative colours you could use instead.
- Faber Castell Polychromos 60 Set
- Light Cobalt Turquoise – alternative colour – Cobalt Green
- Bistre – alternative colour – Raw Umber
- Earth Green – alternative colour – Earth Green Yellowish
- Middle Cobalt Blue – alternative colour – Light Ultramarine
- Individual Pencil Caran Dache Luminance White
- Fabriano Artistico Watercolour Paper 8 x12inch
- Kneadable Eraser
- Derwent Crank Handle Sharpener
- Faber Castell Superpoint Mini Sharpener
- Sandpaper Sharpener
- Embossing Tool
- Slice Tool
- Fluffy Brush
Reference photo from Pexels.com- Photographer Credit: Asish Aji
Smooth Texture - Leaf Tutorial
This tutorial breaks down the process of getting the smooth texture of this nice green leaf with your colour pencils in just under 30 minutes. Only blending with your pencils there is no solvent needed!
- Faber Castell Polychromos 60 set
- If you only have the 60 set, colours you can use instead are listed below:
- Warm Grey 1 – alternative – Warm Grey 2
- May Green – alternative – Earth Green Yellowish
- Permanent Green Olive – alternative – Olive Green Yellowish
- Light Yellow Ochre – alternative – Dark Naples Ochre
- Individual Pencil Caran Dache Luminance White – alternative – Luminance white – polychromos white
- Saunders Waterford Watercolour paper
- Kneadable Eraser
- Derwent Crank Handle Sharpener
- Faber Castell Superpoint Mini Sharpener
- Sandpaper Sharpener
- Fluffy Brush
Reference photo from iStock – Photographer Credit: Freder

Transferring an image to canvas
Ok so… wait!! You want to get started with your colour pencil piece but how do you get the outline on your paper to start!?! I’ve got you! There are so many ways you can get your outline down but one of the quickest and most accurate is in this video! Not of the highland cow – but of a handsome Stag.
Some of the other methods include using a light box, transfer paper, put your original up on a window to trace the outline, free hand sketching, grid method or using a ruler/protractor!
Any of these methods are perfectly fine!! All you need to do is make sure the outline is clear enough to see – light enough to erase as you go and most importantly the features are accurate!! There would be nothing worse than getting halfway through a piece realising the nose is off center!!
To get your image on the paper the way outlined in the video above you need:
- Printed copy of your reference photo REVERSED!!
- Art paper for final copy
- Tracing Paper (Mont Marte Tracing Paper Pad A4 60gsm 40 Sheet : Amazon.com.au: Home)
- HB Pencil
- Eraser
- Washi Tape
Snake
Welcome to this Snake tutorial!
Create this gorgeous snake in just over 4 hours in real time with colour pencils. Complete the whole 5 plus hours to complete the background as well.
Scales can be tricky so we discuss how to tackle this texture including blending only with colour pencils and no solvent. At the beginning I give you a quick run down of how I have picked the colours for this piece.
If you are wanting to use solvent and complete the background as I have done in the video please go ahead! Although I also think this guy looked great just with a plain background. You can always use your own artistic license and add or take away anything you like for these tutorials to make it your own. Otherwise you could do a painted background, pan pastels or change up the colours! I would love to see the outcome of your piece.
Please remember any supplies you have are able to be used for this piece, it is not necessary to use the exact colours and supplies listed below:
- Faber Castell Polychromos 60 set
- Individual Pencil Caran Dache Luminance White
- Strathmore Bristol Vellum Paper size 7 x 5 inch with 1 cm boarder
- Zest-it Colour Pencil Blender (only for background)
- Small Round Size 3 Paint Brush
- Size 6 Water Colour Brush
- Kneadable Eraser
- Derwent Crank Handle Sharpener
- Faber Castell Superpoint Mini
- Sharpener Sandpaper Sharpener
- Fluffy Brush
- Washi Tape
Reference photo from pexels.com although there was no photographer mentioned

Wolf Nose
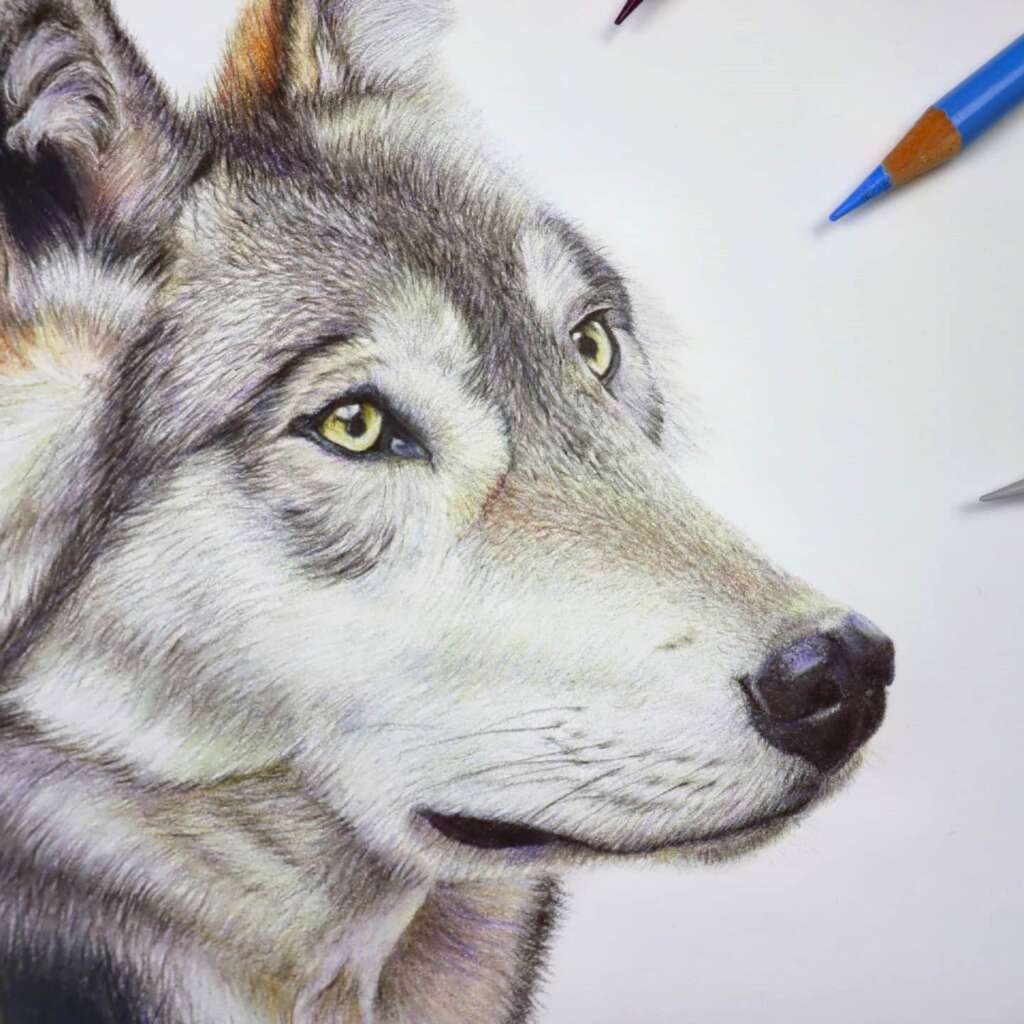
This wolf I completed quite a while ago and still have the final part of this piece which is this boopable nose! Complete this tutorial in 30 minutes!!
I really enjoyed this wolf and would love to do another wolf like this one in time. I have added the sketch of this wolf below so if you would like start with the nose then continue to do the rest of the piece you would be off to a good start! otherwise completing a small nose is great practice – you could always make it a larger size too!
- Faber Castell Polychromos 60 Set
- Holbein Artists Soft White Pencil – Alternatively use – Polychromos/Prismacolor/Luminance White
- Additional Colours:
- Warm Grey 1 – Alternative colour – Warm Grey II
- Warm Grey III – Alternative Colour – Warm Grey V
- Sky Blue – Alternative Colour – Light Ultramarine
- Dark Sepia – Alternative Colour – Black
- Fabriano Artistico Hot Pressed Water Colour Paper – full piece was 8 x 12 inch
- Kneaded Eraser
- Derwent Crank Handle Sharpener
- Faber Castell Superpoint Mini Sharpener
- Sandpaper Sharpener
The reference for this photo is from Pixabay – Photographer credit to: Christel Sagniez
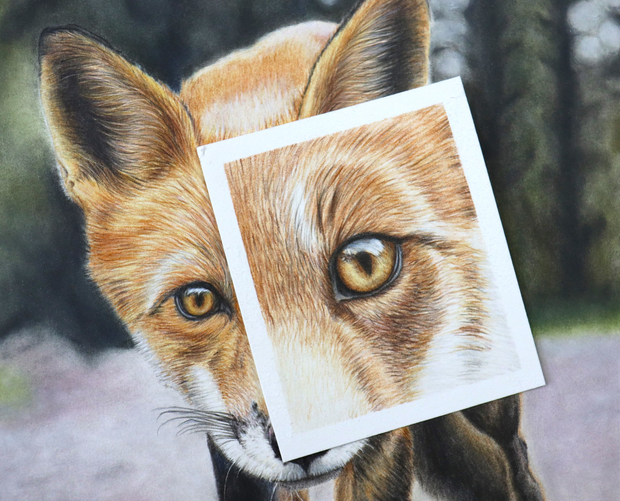
Fox Eye
Drawing eyes can be quite tricky but this video breaks down each of the steps and techniques you can use to follow along!
- Faber Castell Polychromos 60 Set
- Holbein Artists Soft White Pencil – Alternatively use – Polychromos/Prismacolor/Luminance White
- Additional Colours:
- Ivory – Alternative Colour – Cream very lightly
- Orange Glaze – Alternative Colour – Cadmium Orange
- Beige Red – Alternative colour – Coral
- Warm Grey 1 – Alternative colour – Warm Grey II
- Light Yellow Ochre – Alternative Colour – Dark Naples Ochre
- Warm Grey III – Alternative Colour – Warm Grey V
- Sky Blue – Alternative Colour – Light Ultramarine
- Dark Sepia – Alternative Colour – Black
- Saunders Waterford Hot Pressed Water Colour Paper Size 4×4 ich
- Kneaded Eraser
- Derwent Crank Handle Sharpener
- Faber Castell Superpoint Mini Sharpener
- Sandpaper Sharpener
- Washi Tape
Reference photo is from unsplash – Photographer credit: Sunguk Kim